DYNAMICS 365 CRM CONSULTING
How to add additional fields to a Dynamic Word Template’s XML schema
Author – the tin dog

Article Links
- Accessing The Word Template
- Extract and Modify the XML
- Locate the file item1.xml
- Rename the extension
OK – so you have a Dynamic Word Template that was created at some point in the past and you now need to add additional fields to the template

This blog assumes you have access to the original/current MS Word Template document. If not – I’ll add details on how you can export this using XRM Toolbox below: Ensure you have the XRM Toolbox installed and connected to your Dynamics 365 environment.
Steps to Export and Modify the Word Template
Open XRM Toolbox:
- Launch XRM Toolbox and connect to your Dynamics 365 environment.
Use the Document Template Manager Plugin:
- Search for Document Template Manager in the XRM Toolbox plugin list and open it.
Select the Desired Template:
- Once the plugin loads, it will display a list of existing Word Templates from your Dynamics environment.
- Locate the template you wish to modify and select it.
Export the Template:
- Click on the
DownloadorExportoption. This will save the selected Word Template file (.docx) to your local system.
Adding The Fields
OK – so this contains a couple of steps to get to the XML Schema. At this point Im assuming that you know how to get the database schema names for the fields you need – if not, try checking the Power Apps solution for your Dynamics to get the field names.
Add Fields in XML Mapping of Existing Word Template Used In Dynamics 365 CRM
1. Locate your Word document and change the file extension; from DOCX to ZIP
NOTE: For some reason I was not able to correctly extract the file using my Mac, and resorted to using a Windows powered laptop.
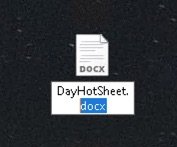

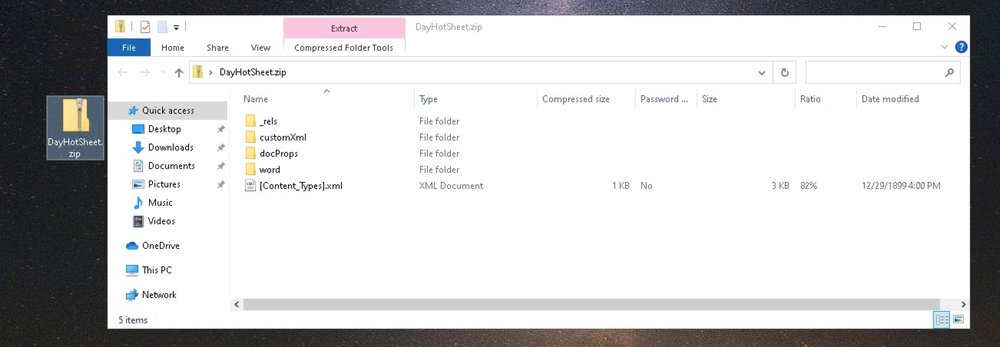
2. Open the zip file and navigate to the Custom XML folder
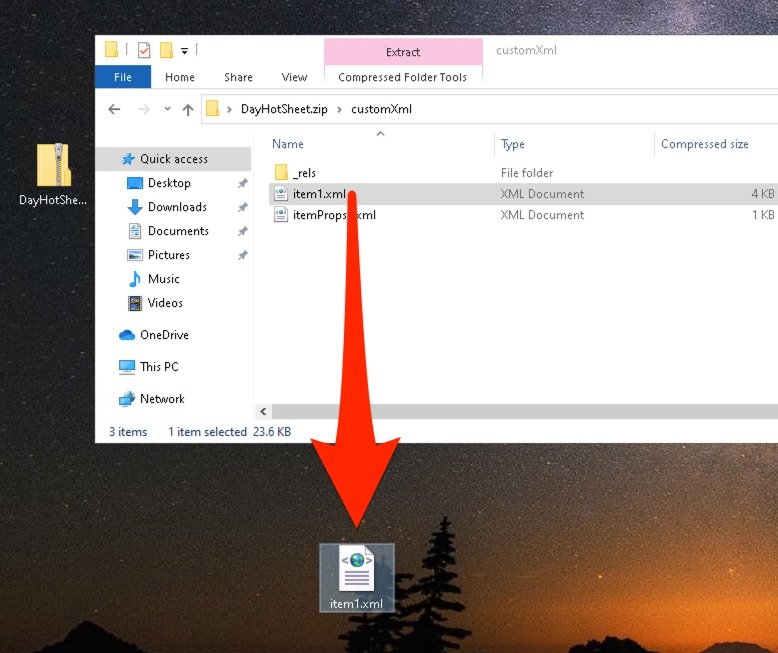
4. Copy the item1.xml file to your desktop
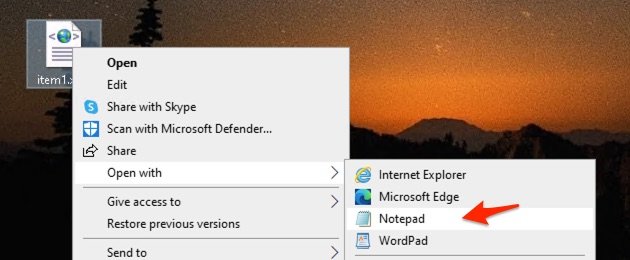
5. Locate the file item1.xml and open this file using NotePad or your favorite text editor
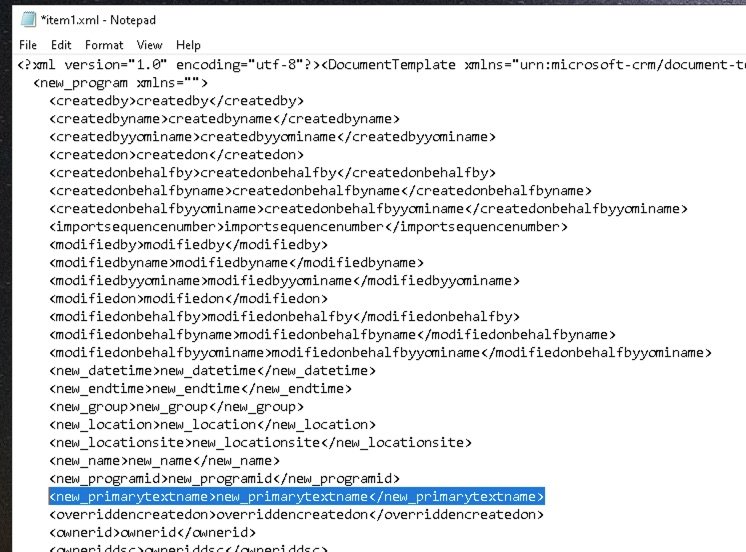
6. You’ll see the content of the xml file looks similar to the xml generated by ‘Advanced Find’ or other Dynamics FetchXML.
7. Insert your new field into the attributes list and save the text file using the same format as the other attributes in the file.
8. Copy the file back into the zipfile
9. Rename the extension of the zipfile back to ‘docx’
10. Open in Word and test that you can now see your fields.
Add Fields From a Related Table in XML Mapping of Existing Word Template Used In Dynamics 365 CRM
Ok, this is a little more interesting but doable.
First you’re going to need to get the name of the relationship between your primary table and the secondary table.
eg. If you want contact information to show on a report/word document focused on the accounts table, you’ll need to locate the 1:Many relationship name. This can be found in the make-powerapps under the relationship node for the table.
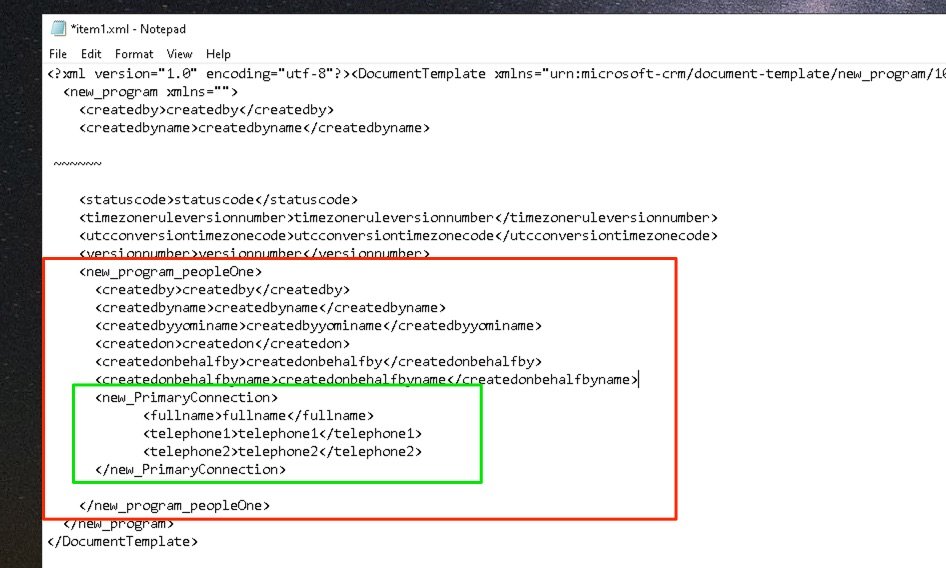
Next, follow the steps above, until you get to step 6. Here you will need to insert the relationship name, and then nest the attributes under the relationship name node.
If you want to nest another relationship, you must add the close tag to this relationship first.
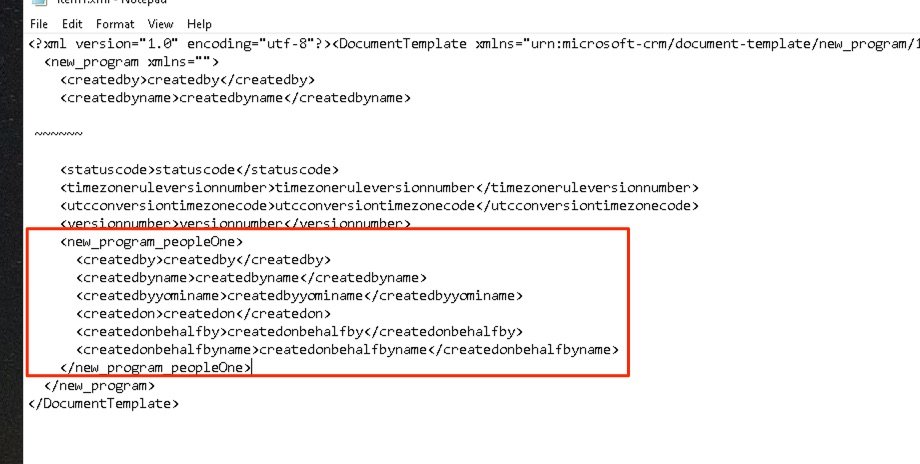
If you want to add another relationship that is further related, this must be WITHIN the relationship tags.
Interested to learn more ?
Im gonna be honest – Dynamics 365 is one of those tools that is an incredibly powerful platform for your organization. With that power, comes a certain level of complexity. If you’d like to get some real answers about how Dynamics can benefit your organization, give me a call for a quick chat to see if it’s an option for you.
Give us a call at 604.846.4402 or email info@dominicsystems.com